



The six basic elements to join together when building a raft are flotation, a sturdy deck, some type of propulsion, steering, teamwork, and safety. The information that follows will explain each of these key principles in more detail. This knowledge should give you a good idea on how to build a raft.

Rafts can be built from scrap wood, foam, barrels, plastic buckets, and recycled materials of every kind. With a little creativity you can take whatever is around you and recycle it into something that floats. Rafts are as varied as the imagination is capable of conceiving them.


First off rafts are not boats and therefore donít need watertight integrity. This is because theyíre almost always built from materials that are naturally buoyant. A typical raft can be made out of some combination of foam, plastic barrels or bottles, wood, and anything else that floats. These materials will continue to float even when they are damaged. The DaVinci Amazing Rowing Machine's floats were built entirely out of foam and is an excellent example of how versatile this material can be for raft building.

Foam is by far the most common flotation material used on rafts. It is easy to obtain, comes in a variety of shapes & sizes, it's lightweight, easy to cut & shape, and works well with all kinds of different raft designs. The best method is to join two foam pontoons with a wooden frame and then lay a piece of plywood on top to create a sturdy deck. This technique works equally well with small, medium, and large sized rafts.
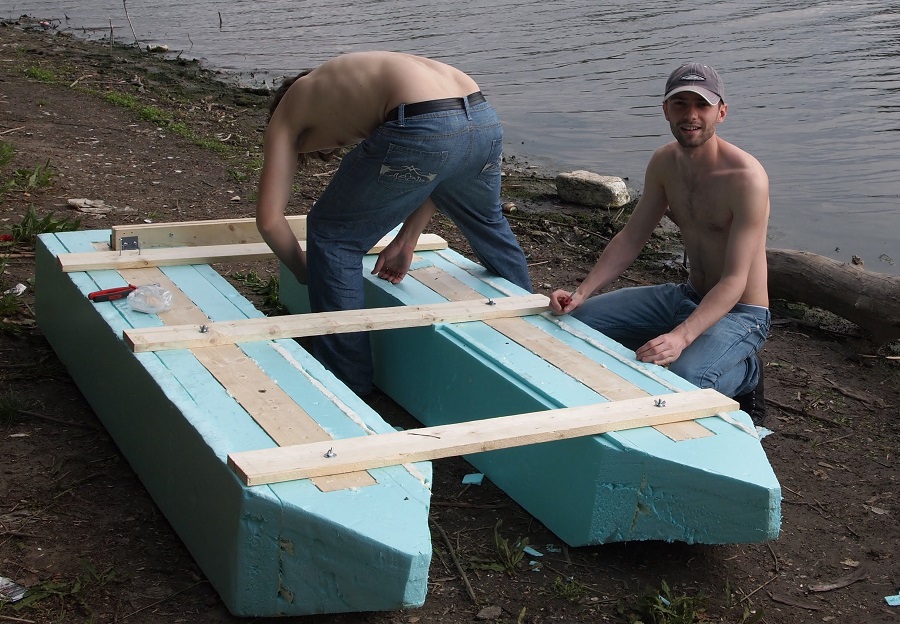
Chunks and odd scraps of foam are often found floating up on riverbanks and beaches. These can be stuffed into a frame you construct out of wood. Expandable foam in a can (used for insulation jobs) quickly spreads out to fill in gaps and cracks. It can be used as glue to hold all your floating objects together inside your hull. The trick is to fill in as much airspace as possible before using the expandable foam. Consider adding things like packing peanuts, small soda bottles with lids, and anything else that is small and will float. If you use a wooden frame to hold everything together be sure to enclose it on all sides so that it retains any loose pieces.
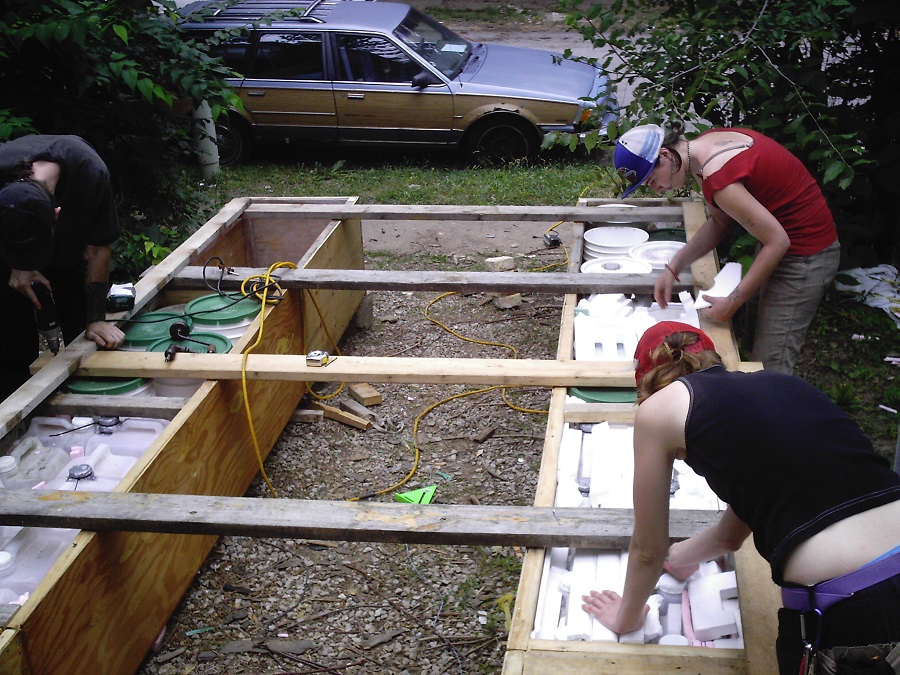
Foam scraps can be found in many different places such as construction sites, in dumpsters, at the landfill, and inside shipping containers . Always ask for permission before taking any surplus materials being thrown out. Sometimes you can find a marina that has lots of old dock foam pieces piled up. If you ask nicely or offer to do some work for the boatyard you may be able to get some second-hand foam pieces for free.

The All Day Suckers raft was built using dock foam and has a simple wooden frame that holds all the pieces together. This design is unsinkable since everything used in its construction is naturally buoyant. This is an easy raft to spot since it has four giant lollipops sticking up from the deck.

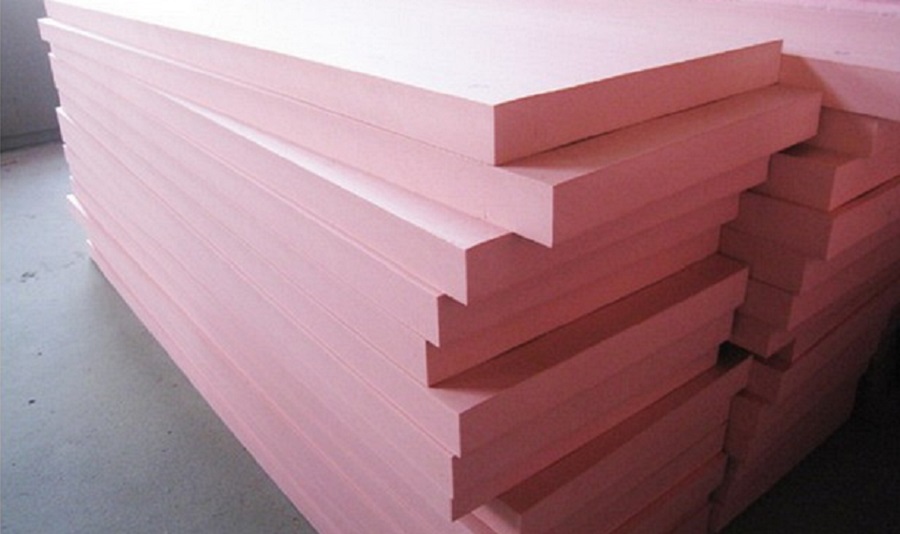
Foam can also be bought at Home Depot or Lowe's if you canít find any for free. The foam there is typically available in sheets and can be cut to size and stacked to form your floats. If you want to glue your foam sheets together try the adhesive on a scrape piece first to make sure the glue wonít dissolve the foam.
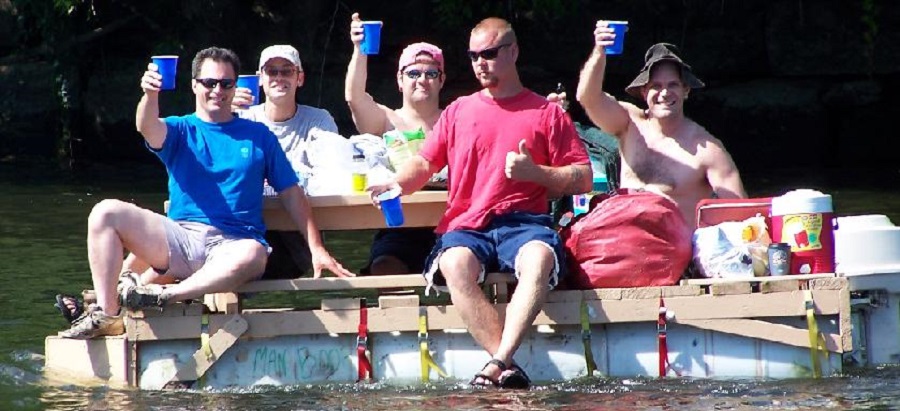
Remember, a raft is much more rewarding to build with free recycled materials and on a shoestring budget. A good example of this can be seen from a group of guys who built their raft out of a picnic table and some old foam scraps they found laying around. They named their raft $1.98 which reflected the amount they spent on the materials used to construct their raft. This clearly illustrates that it is not necessary to spend a lots of money to build a raft. Using what you already have on hand can be a real time & money saver.
The Lin Lee raft uses stacked sheets of foam for flotation and has a more complex design incorporating a small fly bridge and a paddle-wheel for propulsion. Four of the crew members operate the mechanism to drive the raft forward. This is one of the top contenders in the Cruising Class. This is a very fast raft that is highly maneuverable due to a rudder mounted up front.

Plastic barrels of all types & sizes can also be used as flotation. These can take a lot of abuse without puncturing. Barrels can be obtained from your local car wash, bulk juice distributor, landfill, and other places where bulk fluids are used.
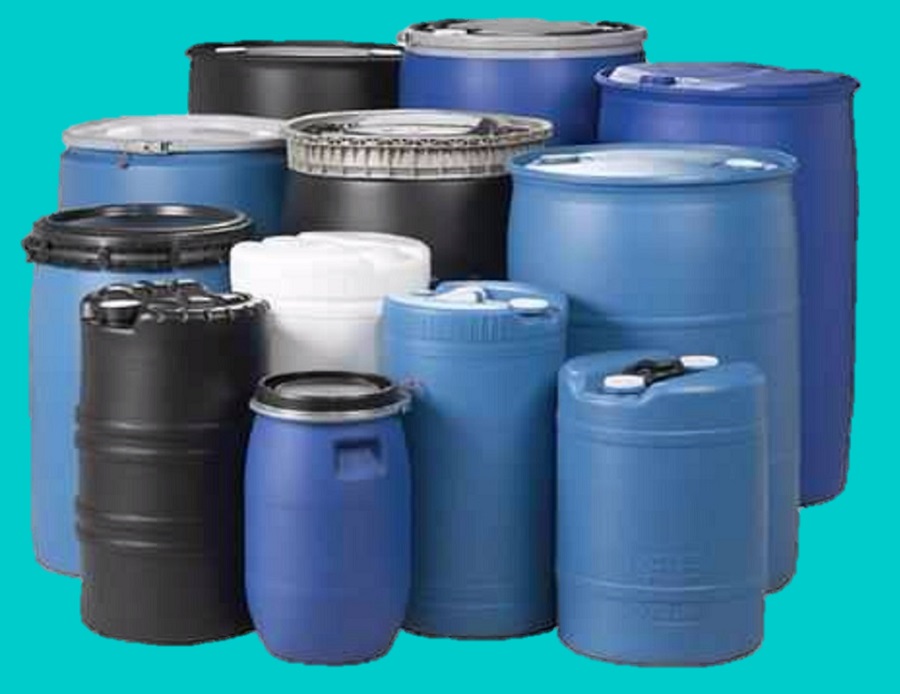
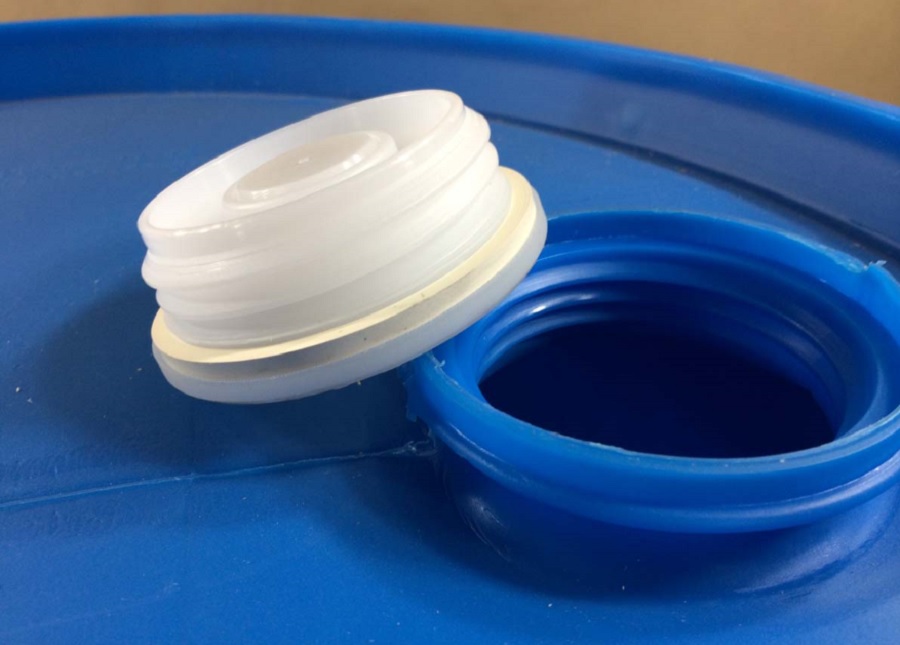
Always try to get barrels for free. If that doesn't pan out go on your local Freecycle website. Someone may have barrels they are willing to give away. Another option is to go on craigslist and see who has some up for sale. Be sure to get the caps too, these are called bungs, and are used to seal up the fill hole & vent. These keep the barrels watertight.
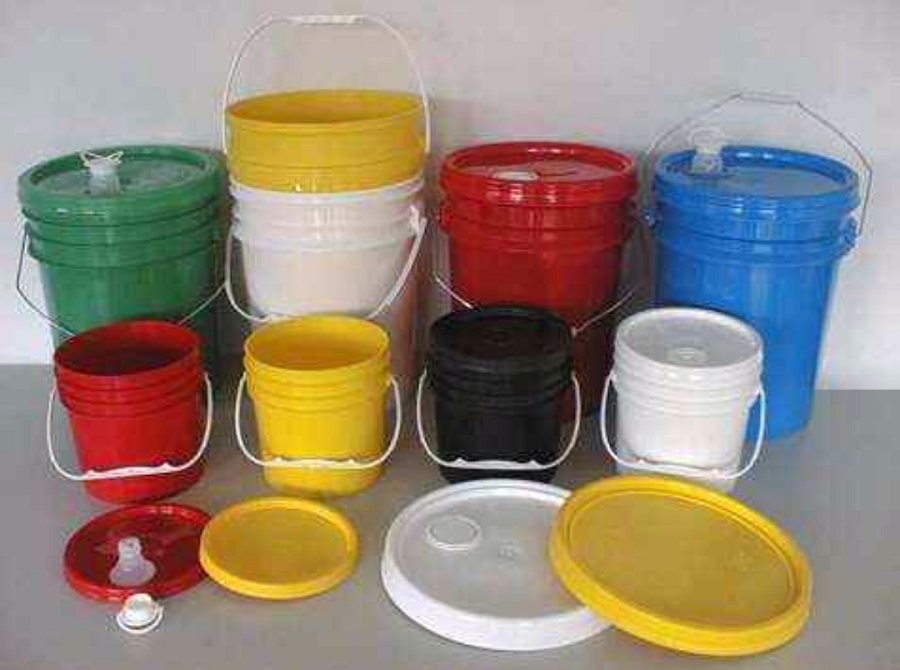
Another great flotation option is 5 gallon buckets & lids from a painter or sheet-rock worker. Their bulk materials come in these containers and are the perfect size for raft building. Be sure to clean out any residual materials left inside before using them. Buckets are easy to obtain and can be used as is. They are very durable and do not breach easily when abused or dragged over rocks, mud, or submerged sharp objects. They are also of a manageable size and can be easily adopted into many raft designs.
The Bucket Brigade raft was built by three girls who duct taped 5 gallon buckets to the rungs of an old ladder. They also attached foam to the sides too. An outrigger was added, for stability, at the suggestion of the raft inspectors upon which a plastic duck was attached. This simple barrel raft worked so well that the girls won the Becky Thatcher Award!

If your planning to build a large raft be sure to build a frame that can hold the barrels securely. Space the framework in such a way so as to contain the barrels so they won't move. Use rope and/or ratchet-straps to hold the barrels firmly against the framework.
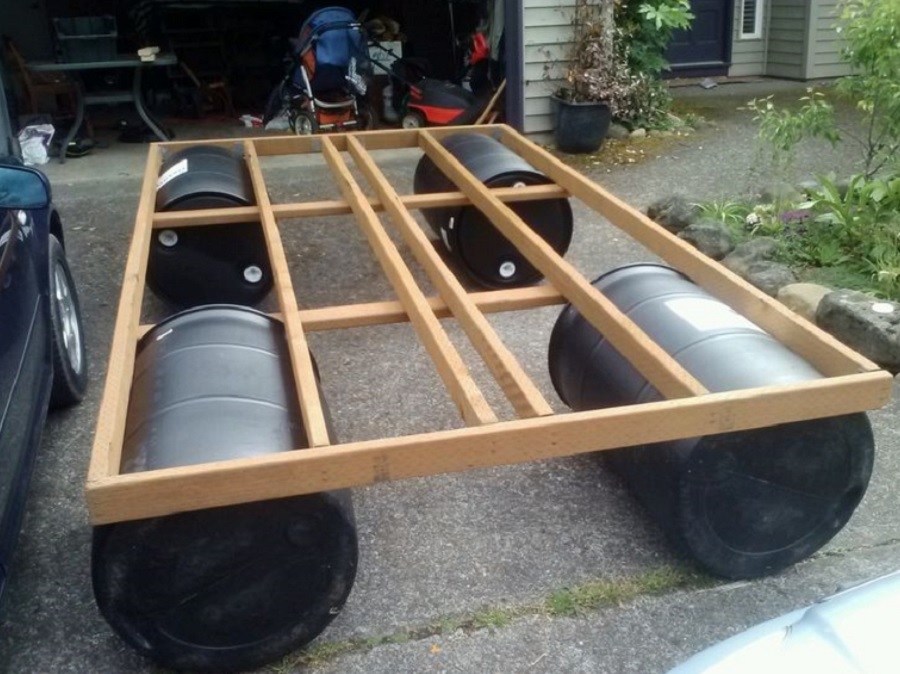
The Morning Wood raft is a great example of how to build a barrel raft. It has plenty of flotation, a carpeted deck with comfortable sofa to sit on, and a nice big sail to take advantage of wind power.

Barrels are a popular form of flotation used at the raft race. They can support a lot of weight, are very durable, and can be used as is with little if any preparation other than installing the bungs. Many of the rafts grow larger at subsequent events as more barrels are procured throughout the year.
Sonotubes can be used to create flotation pontoons but require modifications in order to be used successfully. These are the cardboard tubes that are used as forms to pour a cement footing to support a patio, porch, or shed. The ends of the tubes must be capped and sealed up to keep them watertight. Additional bulkheads may also be necessary along the length of the tubes so they don't get crushed by the weight of the raft and crew.

Sonotubes are somewhat waterproof as they are already coated with a waxy substance. It would be wise add an additional layer of waterproof paint, plastic, or duct tape. Store a sonotube raft in a garage, shed, or basement as they cannot tolerate a damp environment indefinitely.
Large plastic storage bins are another easy to use floatation item. They can be used to construct sectional floatation pods. Multiple pods can be joined together to form a larger raft. The benefit to this type of construction is that the raft can be broken down for easy transportation.

Rafts need sufficient flotation to support the weight of the raft, the crew, and any stuff brought on-board. This will vary for each raft and is dependent on your crew size, the raftís construction, the materials being used, and the cargo brought along.
It's good practice to have extra flotation as this allows for a larger margin of safety in case your weight estimates are wrong. Other factors may come in to play that you hadn't planned on. For instance, one of your floats could spring a leak, you may take on an additional crew-member at the last minute, or someone brings a heavy cooler on-board full of delicious chilled beverages & snacks. Could your raft float with this extra weight? Always build in some extra flotation to accommodate these kinds of scenarios.

The flotation requirement for a raft is easy to calculate. The first step is to know your crew's weight. This can be found using a simple bathroom scale. Lets assume a crew of six weighs in at 860 lbs. The second step is to know the weight of your raft. This can be a bit harder to estimate but lets say it's 400 lbs. The third step is to add in some extra weight to provide a margin of safety. For this example we'll add in another 540 lbs. The total weight to float is 1800 lbs.
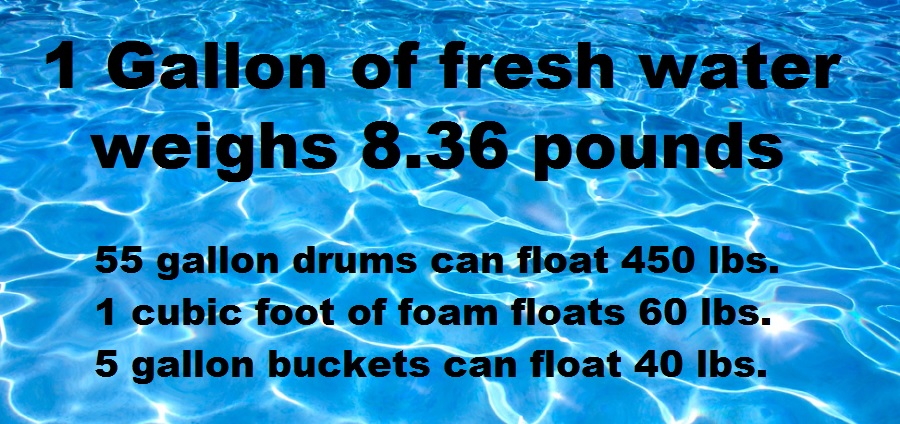
For each gallon of water displaced by flotation materials you will gain about 8 pounds of buoyancy. This is the force that causes objects to float. By dividing 1800 lbs. by 8 lbs. we calculate that 225 gallons of water needs to be displaced. This can be accomplished by using four 55 gallon drums, eight 30 gallon drums, 30 cubic feet of foam, forty-five 5 gallon buckets, or 225 one gallon milk jugs. Any combination of these materials can be used provided they equate to 225 gallons of displaced water.


The placement of buoyant materials should be equally distributed in order to ensure a raft has good stability. The best placement is on each side of the raft just like on a pontoon boat. Avoid placing all your flotation materials in one centralized location as this orientation will make your raft very unsteady and tipsy. If your raft is long but not very wide consider adding outriggers to either side to provide more stability. The Triceratops raft uses this technique to stay upright.


The deck of your raft is where youíll be sitting as you go down the river. It should be strong and able to support the weight of the crew and any gear youíll have on board. The most common deck material used on rafts is plywood that is attached to some sort of wood framing underneath. Donít use old pieces of wood full of splinters as this isnít too comfortable or safe to sit on. Use newer pieces of wood that are strong and robust. Placing a piece of old carpeting on top of the deck will provide a nice surface to sit on.

Use rope, tie-downs, ratchet-straps, or any other suitable method to attach your flotation materials to the underside of the raft's wooden frame. Your raft's flotation must be fastened securely in place. Be mindful that it may be necessary to partially disassemble your raft in order to transport it to the river. You may also need to re-tighten these fastenings periodically. Keep this in mind when tying knots in rope, make sure you can untie it if necessary. Ratchet-straps are preferable as they are the easiest to release & re-tighten.

Always use screws to connect the deck and framework, donít use nails. Once the raft gets wet and starts striking waves it will flex and twist. Nails will tend to loosen and work themselves loose and may even eventually fall out. Screws stay put much longer. A nice addition to a deck is some sort of canopy to provide shade. A large umbrella will work just fine as will a small tarp and some sort of framework to hang it on.
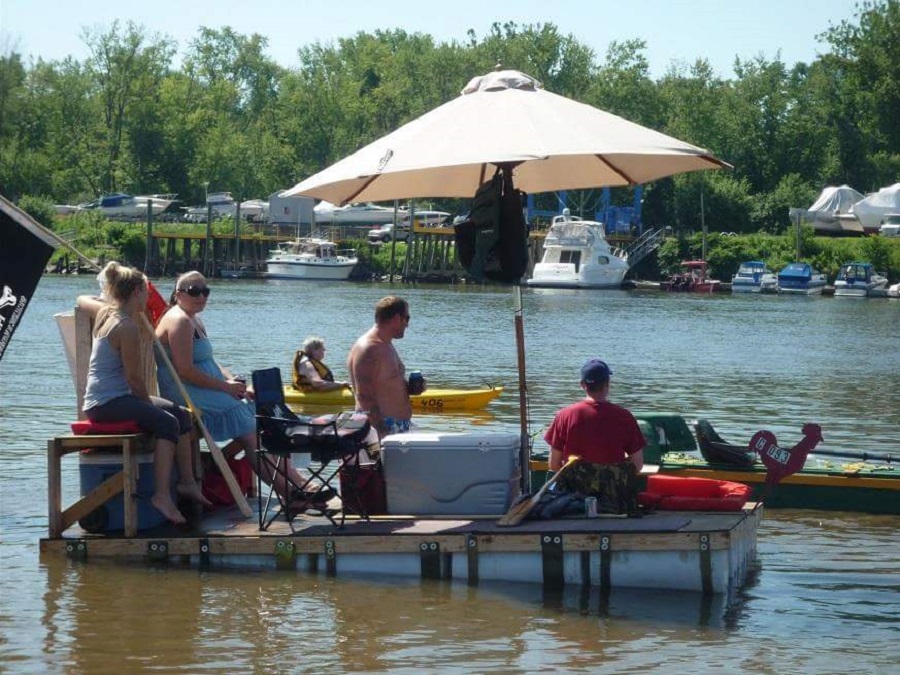
When designing your deck leave plenty of room for your crew to do their rowing or paddling. If the deck is too small paddlers may bang oars or not have enough room to kneel down or sit comfortably while rowing. You also want some spare room for a cooler, your first aid kit, anchor, tow ropes, and any other supplies or tools that you will be carrying along on your raft.
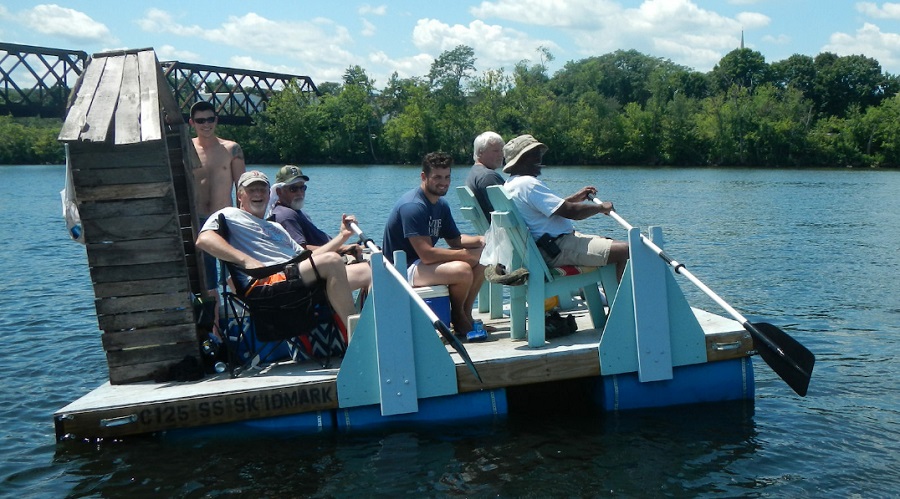

Some rafts simply drift downriver letting the current push them along while the crew relaxes and enjoys the scenery. These rafts use paddles to steer around obstacles and make minor course corrections. Sometimes the intent is to tie up against other drifting rafts to form a large flotilla.
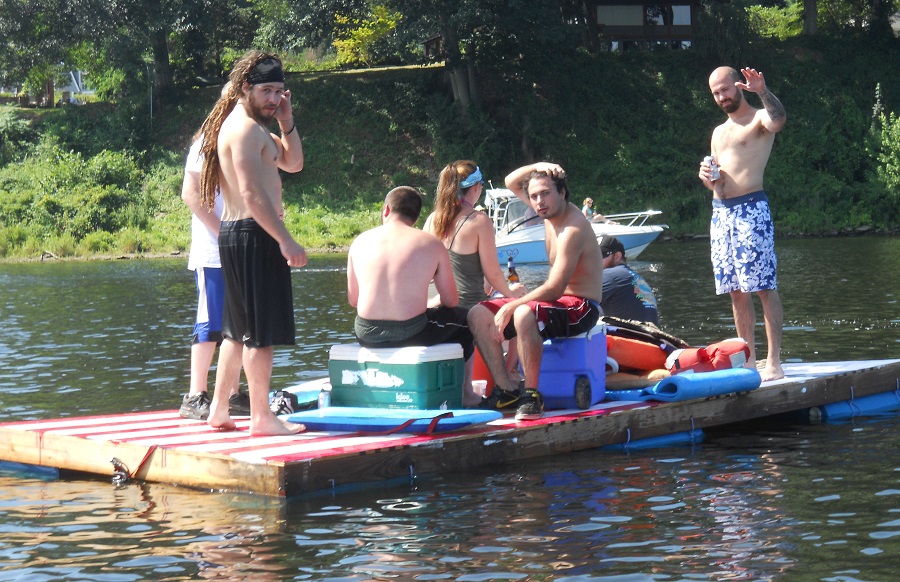
Most rafts use some form of propulsion to move through the water. Oars are a popular choice and very effective especially when oarlocks are fastened to the deck. This gives rowers better leverage and makes rowing much easier.
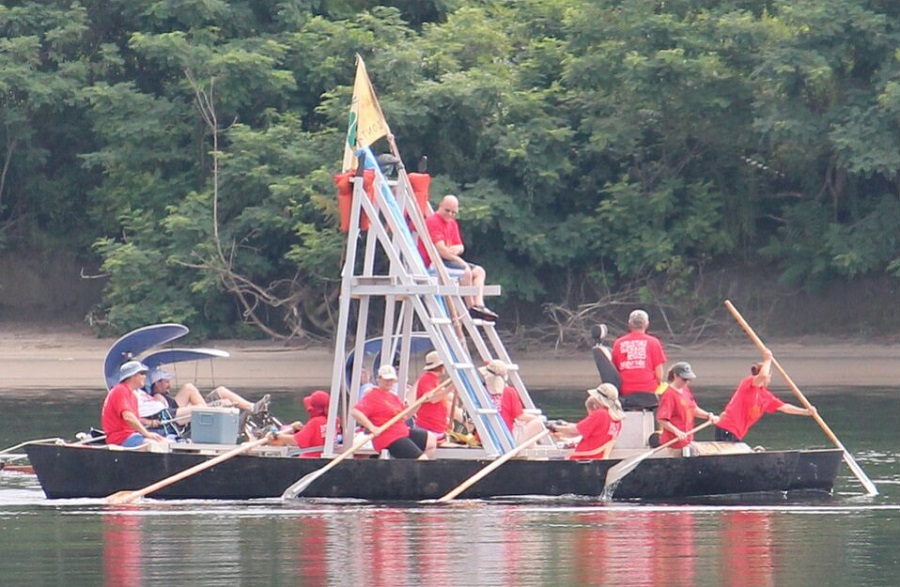
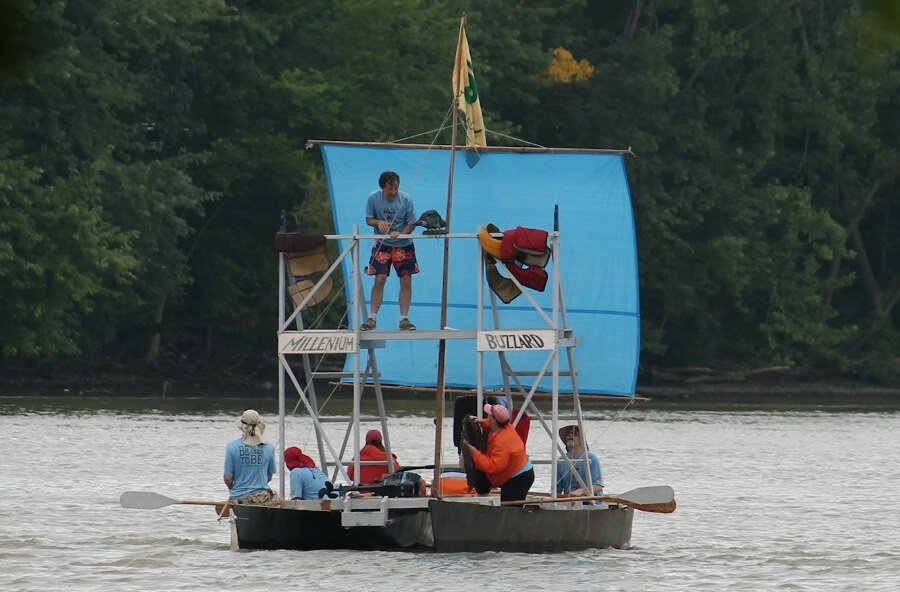
Another popular choice is to rig up a sail made out of an old tarpaulin or bed sheet. Sails are great on windy days but can be unreliable. Sometimes the wind will be blowing the wrong way and at other times it will blow in the right direction. There is no way to know if youíll catch a favorable breeze or not. Many rafts rig up a sail and keep it stowed until such time that the wind is right. Be sure to support the mast holding up the sail on three sides with sturdy rope. This triangulation is necessary to safely hold everything together in a strong breeze.
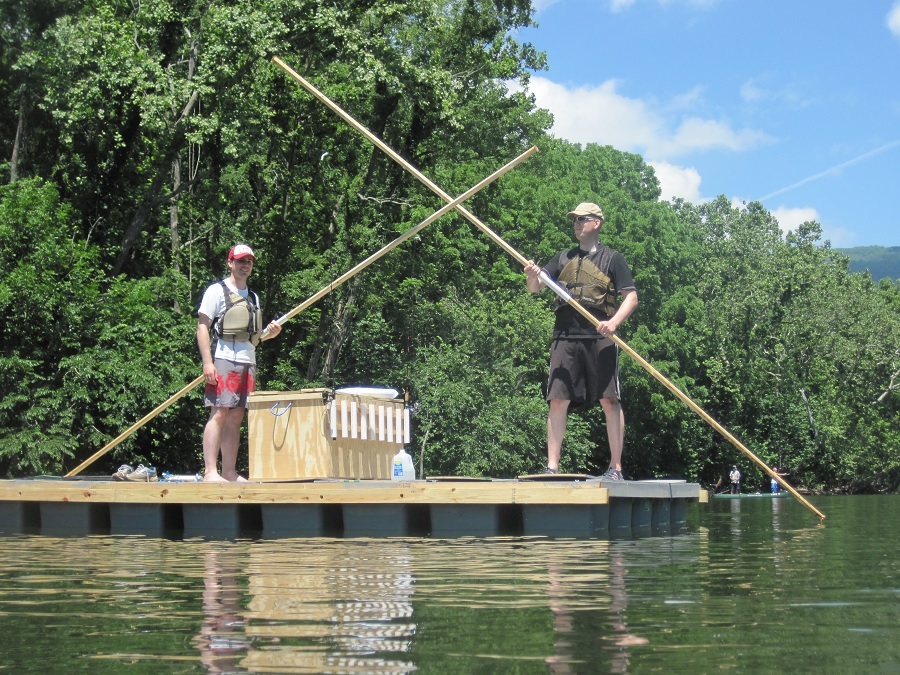
Another propulsion option is to use poles to push the raft along in the shallows along the riverbank. This can work very well until the raft needs to head into deeper water to navigate around an obstacle. It's best to bring along a few paddles to propel the raft forward when the poles can't reach the river bottom.

A few raft teams have build homemade paddle-wheels using an assortment of bicycle parts. These can work quite well if put together properly. Make sure you are able to adjust the height of the paddle-wheel assembly so that only the tips of the paddles hit the water. A paddlewheel submerged too deeply will be very hard to spin. The Lin Lee raft has a well designed paddle-wheel that works quite well. Four crew members push & pull on levers to propel the raft forward.

Another option is to build a pedal powered propeller. This can be a very efficient propulsion device. Building one will require more than just a few odds and ends from a bicycle. The easiest way to make one is to find an old stationary exercise bike and weld a pipe underneath the sprocket. This pipe needs to have a T-fitting on the opposite end where the a shaft, bearings, and propeller can be mounted.
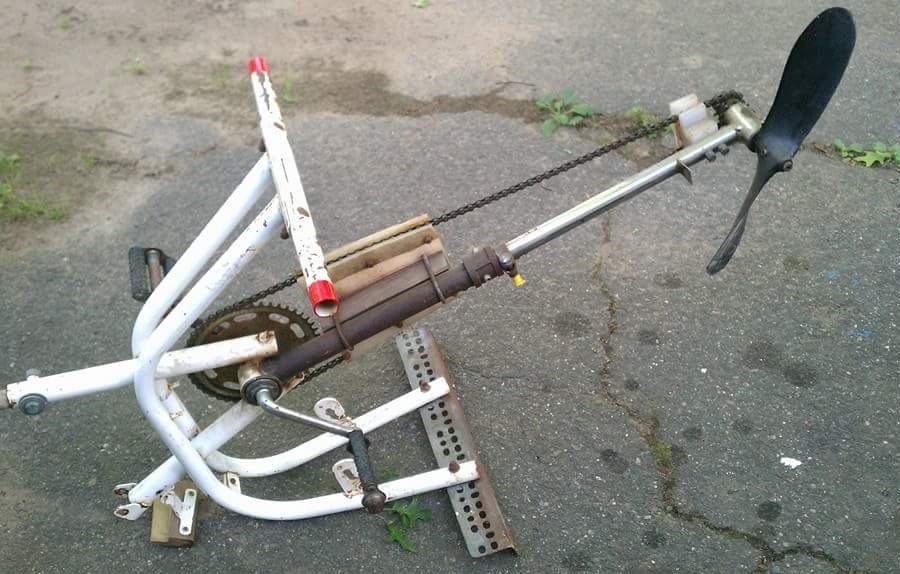
A long length of chain is needed to run between the chain's two sprockets. This can be pieced together from multiple bike chains or use a garage door opener chain. These are much longer than a bike chain and are continuous in length. The long chain will flex and derail off the sprockets easily if it's not properly supported in some way. A chain guide made out of an old cutting board or piece of wood will help keep the chain on the sprockets, especially when separate guides are placed in close proximity to each sprocket.

You will not need to oil the chain as water is a pretty good lubricant, plus you donít want to be putting oil into the water. Cut a hole in the deck so the propeller unit can be put in the water but also allowing the frame to rest firmly on the deck. It's best to make a receiver that holds the bike frame in a stationary position. Multiple gate latches can be used to lock it in place.
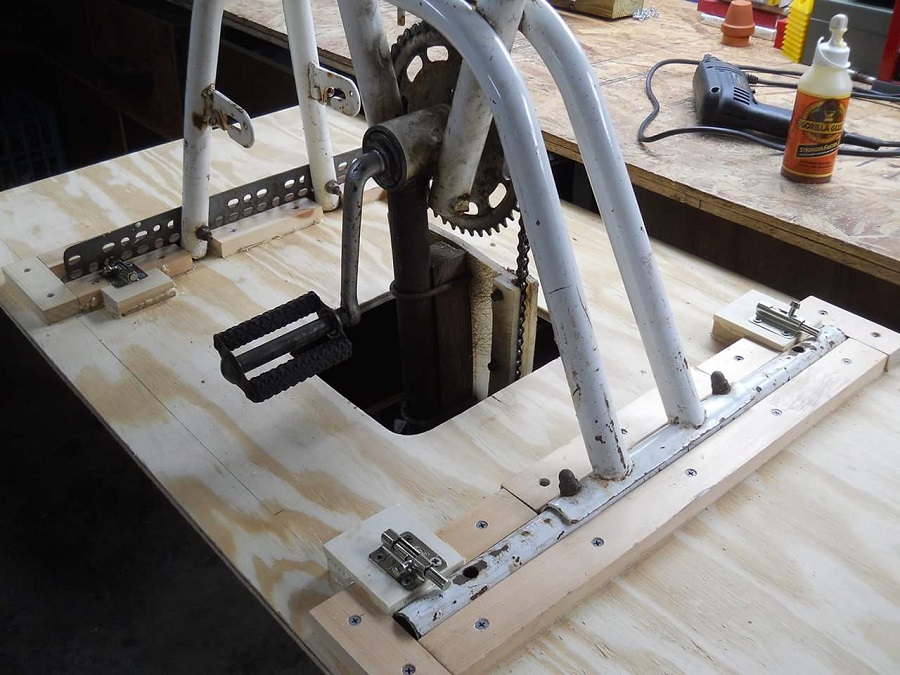
You could use a propeller off an old boat engine or trolling motor but these are not a good choice for human power. A better choice is to use a large diameter blade with lots of surface area. You will have to experiment with different shapes to get something that works satisfactory. A homemade propeller can be made by attaching a strong piece of metal to a small belt pulley off an old snow-blower. The pulley can then be mounted on a driveshaft. Be sure to use a couple of bearings to support the shaft on each end. Lastly, attach a sprocket on the opposite end of the shaft and connect the chain.
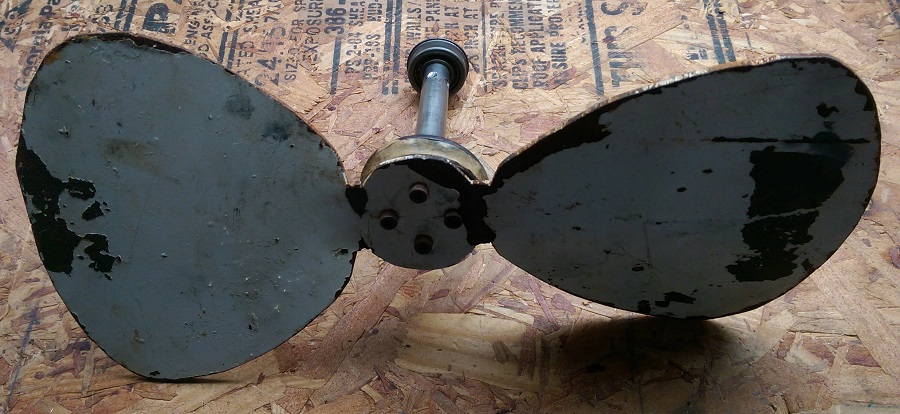
A bicycle driven propeller will take a while to refine. Be sure to test it out and see how it works, and then make changes, adjustments, or modifications until it performs satisfactory. The extra work can yield a very competitive raft that will go way faster then rafts using just paddles or oars. The Little Willie raft has four pedal stations that run two separate propellers.

Regardless of the method of propulsion it is always wise to bring along a few extra paddles or oars. These will come in handy if you loose an oar, the sail has no wind, or your paddle-wheel or propeller breaks down. You need some way to maneuver your raft around obstacles or any boats anchored near a marina. In a pinch a crew member could use a cooler lid, a Frisbee, or their hands as a makeshift paddle.

Slower rafts can be steered quite easily with paddles and oars. But a rudder is much more effective on faster rafts using a paddle-wheel, a propeller, or a sail for propulsion.
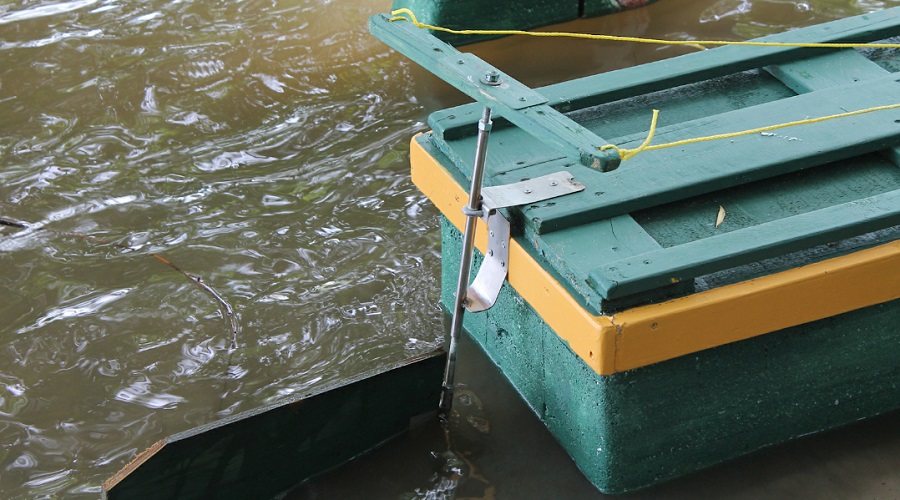
A simply way to make a basic rudder is to tie an oar, at its midpoint, to the back end of the raft. If you want something stronger attach a hinge to the back of the raft and fasten a piece of plywood to it. A tiller handle can then be added so a crew member can use it to steer the raft. A rudder provides the means for effortless and responsive maneuvering and a way to safely steer out of harmís way and onto a great day out on the water.

Teamwork is one of the most important ingredients for raft racing. You'll want to join forces and ideas with as many people as you can. The benefits of this joint effort becomes evident when looking for building materials, borrowing tools, discussing ideas, and constructing your raft. Everyone has different resources and pooling them together to build a raft is the way to succeed. An enjoyable part of raft racing is the preparation stages where you and your teammates get together to plan, build, laugh and carry on, and test your raft.
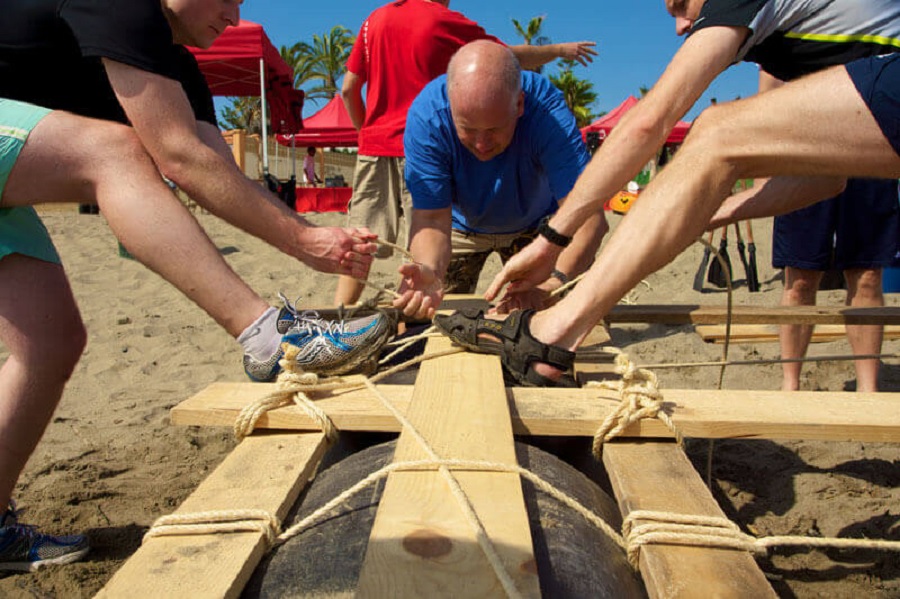
Youíll all have fun working together and get excited and really make great efforts to get everything done. Each person will have some special talent to contribute, or a friend with a truck to help you move your raft. There is a good chance that between everyone you'll have all the tools, talent, materials, ideas, and encouragement necessary to get your raft out on the river. All these different aspects coming together for a common goal exemplifies what teamwork is all about. The whole team will have a stake in the raft and camaraderie will run high on race day!

Safety should be maintained at all times while procuring materials and building the raft. Itís no fun to get hurt, so wear safety glasses whenever handling power and/or hand tools. Also wear gloves when handling your materials and use caution whenever cutting something. Always look out for one another and help your teammates when necessary.

A good practice is to use sandpaper or a file to smooth out and remove sharp edges whenever you cut something. Chances are youíll be wearing shorts on race day and you donít want to sit on a splinter or get cut on anything sharp. Bend over exposed sharp metal edges and cut off protruding bolts. Then apply duct tape to anything sharp so the edges become less dangerous. Have a first aid kit available during your build sessions and whenever youíre out on the water.

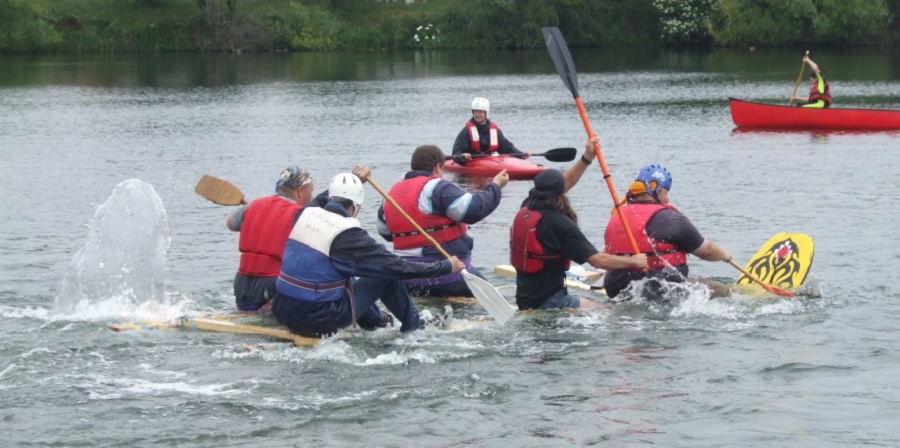
Once youíve finished building your raft, test it out to see how it works. This is important because you donít want any surprises on race day. The First thing to test is if the crew fits on the raft comfortably. Make sure everyone has enough room and can paddle.

The next step is to take your raft to a pond and see if it floats level with everyone on-board. Be sure to include all the gear that will be on the raft. In some cases you may find that you need a little more buoyancy or you might need to re-position some of the flotation materials, or gear, to help stabilize the raft. Be sure to wear your life jackets too!
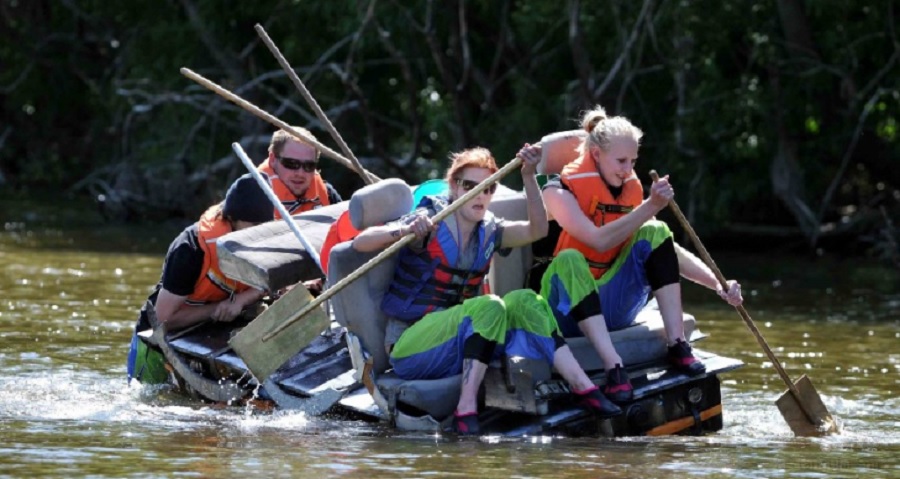
Next, see if your propulsion works as expected. Your crew should try out their rowing stations to see if oarlocks work and are positioned correctly. Try putting up your sail to verify it is in working order. Be sure to see if you can steer. Since paddle-wheels only need to be submerged slightly they may need to be adjusted up or down.

There is a whole list of items that contribute to your raft being a stable platform out on the water. You wonít know how well it will work until you try it out. Make any adjustments beforehand and then retest your raft until you get it right.

This ensures you will be ready to kick some fanny on race day. Make sure all crew members testing out the raft has on a Coast Guard approved life jacket.

Never go out on the water without a life jacket and always look out for your crew-mates. Keep a constant watch on your competitors as well since they could also need some help. Always lend assistance to anyone who needs it when you're out on the water.

Be sure to always carry emergency tools, duct tape, bungee cords, rope, fasteners, and anything else you can think of just in case you need to make an emergency repair out on the water. Things can break, come loose, or fall off. You want to be able to mend anything that needs fixing, tightening, or re-attachment.
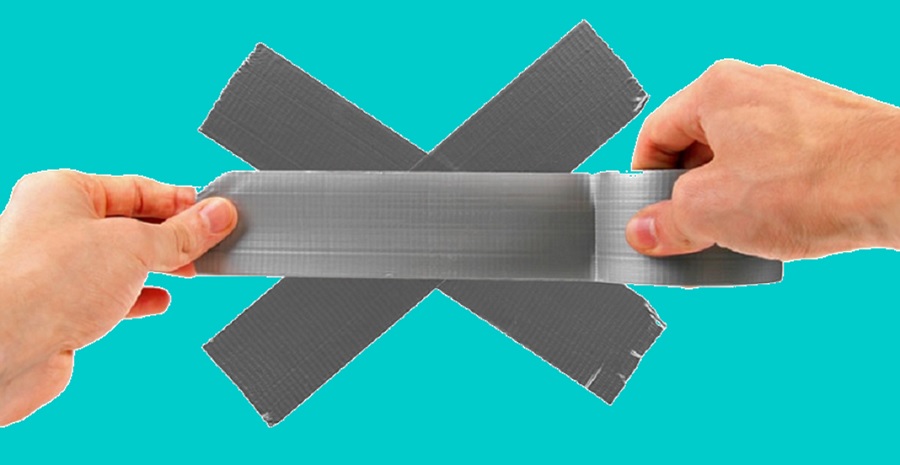
Sometimes periodic adjustments are going to be necessary, especially if you have a paddle-wheel or propeller. All tools should have a safety lanyard attaching it to the raft or enough foam attached so it wonít sink if dropped overboard accidentally. Having the ability to recover from a mechanical problem can be a key factor in winning a raft race. You donít have to succumb to a simple mechanical problem if you bring emergency gear along to save the day.